Are you looking to learn about iPhone DFU mode tool because your iPhone has stopped functioning correctly? Your iPhone may be in a boot loop, displaying a black screen, or experiencing difficulties updating, regardless of what you try to do. All of these problems can be frustrating, and if a user enters DFU mode, they hope to resolve them all.
Unfortunately, entering DFU mode manually can sometimes be challenging, and if you make even one mistake while entering DFU mode, it may only make your problem worse.
Don’t worry about that anymore, as this article will guide you through the DFU mode process, including what DFU mode is, when to use it, how to safely enter DFU mode, and finally, etc.
Let’s get started.
Part 1. What Is DFU Mode on iPhone?
DFU (Device Firmware Update) mode is a special mode that allows your iPhone to communicate with a computer to enable reinstalling the software and firmware on your iPhone. DFU mode allows iTunes or Finder to recognize your device, even when the screen remains black. DFU mode can fix many serious system problems that cannot be fixed using standard ways.
Recovery mode displays a screen that contains a computer and a wire icon; you may update or restore your iOS using Recovery mode, but Recovery mode does not allow you to make complete updates to your firmware. The black screen of DFU mode provides complete control to your computer to fix serious system problems that Recovery mode cannot.
DFU Mode vs Recovery Mode
Recovery mode shows a screen with a cable and computer icon. It can update or restore iOS but does not fully modify the firmware. DFU mode goes deeper, the screen stays black, and the system doesn’t load. This allows the computer full control to fix serious issues that Recovery mode cannot handle.

When Do You Need DFU Mode?
You might need DFU mode if your iPhone has problems like:
- Stuck on the Apple logo
- Keeps restarting repeatedly
- iPhone boot loop caused by 3uTools
- Black screen but still powered on
- Recovery mode restore keeps failing
- Wanting a clean iOS reinstall
DFU mode is powerful, but it requires precise steps, which is why many users prefer using a tool to do it safely.
Part 2. What Should You Know Before Entering DFU Mode?
Before entering DFU mode, it’s important to prepare carefully:
- Back up your iPhone
DFU mode can erase data. Save your photos, messages, and contacts to iCloud or your computer first.
- Prepare a computer and cable
Use a Mac or Windows PC with the latest iTunes or Finder. Make sure your USB cable is good, damaged cables can cause DFU mode to fail.
- Learn the button steps
Every iPhone model has a different button timing. Even a small mistake can prevent DFU mode from activating.
- Check your phone for damage
Hardware issues like broken buttons, water damage, or faulty charging ports can make DFU mode impossible.
Common problems in DFU mode:
- iPhone won’t enter DFU mode even when buttons are pressed correctly (timing is strict)
- Device enters Recovery mode instead of DFU mode
- Restore fails halfway (20%, 50%, 99%) due to firmware or cable issues
- iPhone gets stuck in DFU mode and won’t exit
- Boot loop issues return after tools like 3uTools
Part 3. How to Put iPhone into DFU Mode in Manual?
Here’s how to put iPhone into DFU mode:
For iPhones without a Home button (iPhone 8 / X / XS / XR / 11 / 12 / 13 / 14 / 15)
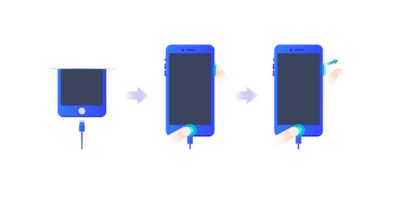
Here’s how to enter DFU mode on newer iPhones, those that use Face ID and don’t have a Home button:
1. Use a USB cable to connect your iPhone to a computer (Mac or PC) and open iTunes (or Finder on newer macOS).
2. Turn off your iPhone. (If it is on, shut it down first.)
3. Quickly press and release the Volume Up button.
4. Quickly press and release the Volume Down button.
5. Press and hold the Side (power) button, keep it held until the screen goes black.

6. While still holding the Side button, press and hold the Volume Down button too. Maintain both for about 5 seconds.
7. After 5 seconds, release the Side button, but keep holding the Volume Down button for another ~10 seconds.
8. If the screen stays black and your computer (iTunes/Finder) detects the iPhone, then the device is in DFU mode. If you see any logo or “connect to iTunes” screen, the process didn’t work; you’ll need to repeat it.
For iPhones with a Home button (iPhone 7 and earlier, or original iPhone SE etc.)
Here’s how to put iPhone SE or 7 into DFU mode to fix errors:
1. Connect your iPhone to a computer with a USB cable and open iTunes (or Finder).
2. Turn off your iPhone completely.
3. Press and hold both the Home button and the Side / Power button at the same time. Keep them held for about 8–10 seconds.
4. After 8–10 seconds, release the Power button but continue to hold the Home button for ~10 more seconds.
5. If the screen remains black and iTunes/Finder recognises the device, you’ve successfully entered DFU mode. If the Apple logo appears, or you see a “connect to computer” prompt, the attempt failed; you’ll need to try again.
So, that’s how to enter Pwned DFU mode on iPhone 7.
Part 4. How to Use an iPhone DFU Mode Tool to Fix DFU Issues?
Manual DFU mode can be tricky. One wrong press or poor timing can leave your iPhone stuck in a black screen, DFU mode, or boot loop.
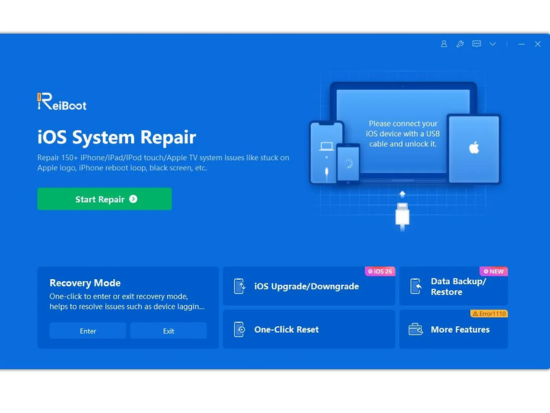
An iPhone DFU mode tool like Tenorshare ReiBoot makes it easy. With just one click, you can enter or exit DFU or Recovery mode without worrying about button timing. It can fix iPhones stuck in DFU mode, black screens, or boot loops.
The Standard Repair feature restores iOS safely without losing data. ReiBoot supports almost all iPhone and iPad models and has a simple interface, making the process fast, safe, and stress-free.
1. What to Do If Your iPhone Is Stuck in DFU Mode and Won’t Exit
If your iPhone is stuck in DFU mode and won’t exit, here are the steps you can follow:
Step 1: Open ReiBoot on Your Computer
Install ReiBoot on your Windows or Mac computer and open it. Connect your iPhone with a USB cable. The program will notice that your device is in DFU mode. Go back to the main screen and click “Start.”
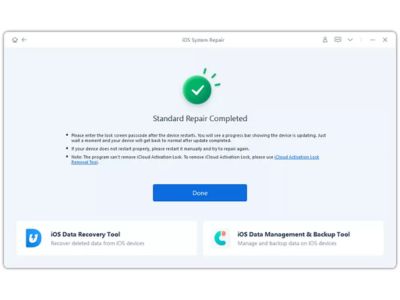
Step 2: Pick Standard Repair
Choose “Standard Repair” from the options. ReiBoot will ask you to download the right firmware file. Follow the instructions to complete the download.

Step 3: Start the Repair
After the firmware is downloaded, click “Start Standard Repair.” ReiBoot will begin fixing your device. In a short time, your iPhone will restart and come out of DFU mode successfully.
2. Alternatives to DFU Mode with ReiBoot
DFU Mode is a powerful repair option, but it’s not always the first method a normal user should try. Many iPhone issues, such as freezing, boot loops, update errors, or the device not turning on, can often be fixed through Recovery Mode, which is easier and safer for beginners. ReiBoot makes this even simpler by allowing you to enter and exit Recovery Mode with just one click.
If Recovery Mode doesn’t solve the problem, only then should users consider switching to DFU Mode. And if your iPhone gets stuck in DFU Mode, ReiBoot’s repair feature can help bring it back to normal quickly.
Below is how you can use ReiBoot to enter recovery mode as an alternative before trying DFU Mode:
Step 1: Install ReiBoot
Download and install Tenorshare ReiBoot on your Windows or Mac computer. Open the program and connect your iPhone or iPad using a USB cable.
Step 2: Click “Enter”
When ReiBoot recognizes your device, click the “Enter” button to start putting your iPhone into Recovery Mode.
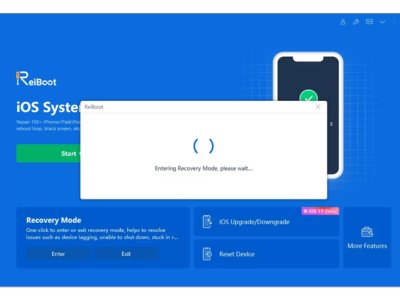
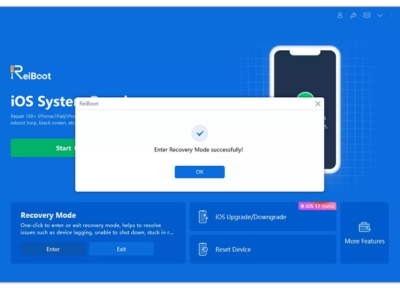
Step 3: Wait for Recovery Mode
Within a minute, your iPhone will enter Recovery Mode. You will see the “connect to iTunes or computer” screen, which means your device is ready.
With ReiBoot, even beginners can confidently enter or exit DFU mode without worrying about pressing the wrong buttons.
Part 5. FAQs on iPhone DFU Mode
Q1: Is it possible to put an iPhone in DFU mode without a cable?
No, it is not possible to enter DFU mode without a cable. DFU mode requires a physical connection to a computer using a USB cable so that iTunes or Finder can communicate with your iPhone and reinstall iOS properly.
Q2: How to DFU when the phone has a boot loop caused by 3uTools?
If your iPhone is stuck in a boot loop caused by 3uTools, using a tool like ReiBoot is the safest option. It allows you to enter DFU mode and repair the system without worrying about precise button timing.
Q3: How to fix when the restore stays at 20% and doesn’t progress?
If your restore process stops at 20% or does not progress, check your internet connection, USB cable, and computer stability. Using a DFU mode tool like ReiBoot can ensure the restore completes successfully without interruptions.
Q4: Can DFU mode downgrade my iPhone using an unsigned IPSW file?
No, DFU mode cannot install an unsigned iOS version. Apple only allows installation of signed firmware files. You can use DFU mode for restoring or reinstalling iOS, but downgrading with unsigned IPSW is not possible.
Conclusion
DFU mode is a powerful way to fix serious iPhone problems, but manual steps are strict and easy to get wrong. Tools like Tenorshare ReiBoot make entering or exiting DFU mode simple and safe. With one click, you can fix boot loops, black screens, and restore iOS without losing data. Whether you’re a beginner or have tried manual DFU multiple times, ReiBoot is the easiest and most reliable way to get your iPhone working normally again.